In our line of work, we often come across legacy automated systems that are no longer compatible with the “latest and greatest” operating systems. (Think, for example of an automated system built in 2010 that only works with Windows 7, not Windows 10 or 11. ) Our technician laptops don’t run Windows 7, obviously because Microsoft ended support for the last of the Windows 7 machines ages ago, and it makes no sense to hold onto a computer with Windows 7 when it now presents a security risk.
What to do? It’s a pain in the rear, to be sure, but not an insurmountable problem. What’s the solution?
The easiest way around this problem is to run Windows 7 inside Windows 10 or 11, via a Virtual Machine. A virtual machine allows the latest Windows system to “run” another operating system entirely within a self-contained window that holds that older operating system. The older operating system is installed within the virtual machine with all of its old capabilities that never mix with the new OS, but it can reach outside to use the current computer’s hardware for its own purposes.
This way, a legacy system that uses software that only runs on or talks to Windows 7 (or any older OS, really, not just Windows) can still be worked on and reprogrammed using the proper OS inside the virtual machine (VM). Below, we will show how to set up a Windows 7 virtual machine, although this can be used with many other kinds of operating systems including Linux and OS X.

“A virtual machine allows the latest Windows system to ‘run’ another operating system entirely within a self-contained window that holds that older operating system.”
Step 1
Install Oracle VM VirtualBox on your computer. VirtualBox is a free download from Oracle that can be found at this downloads page on their VirtualBox sub site. Just pick your appropriate OS from the list and download the associated executable file. Once downloaded, install and fire up VirtualBox to the opening window.
Step 2
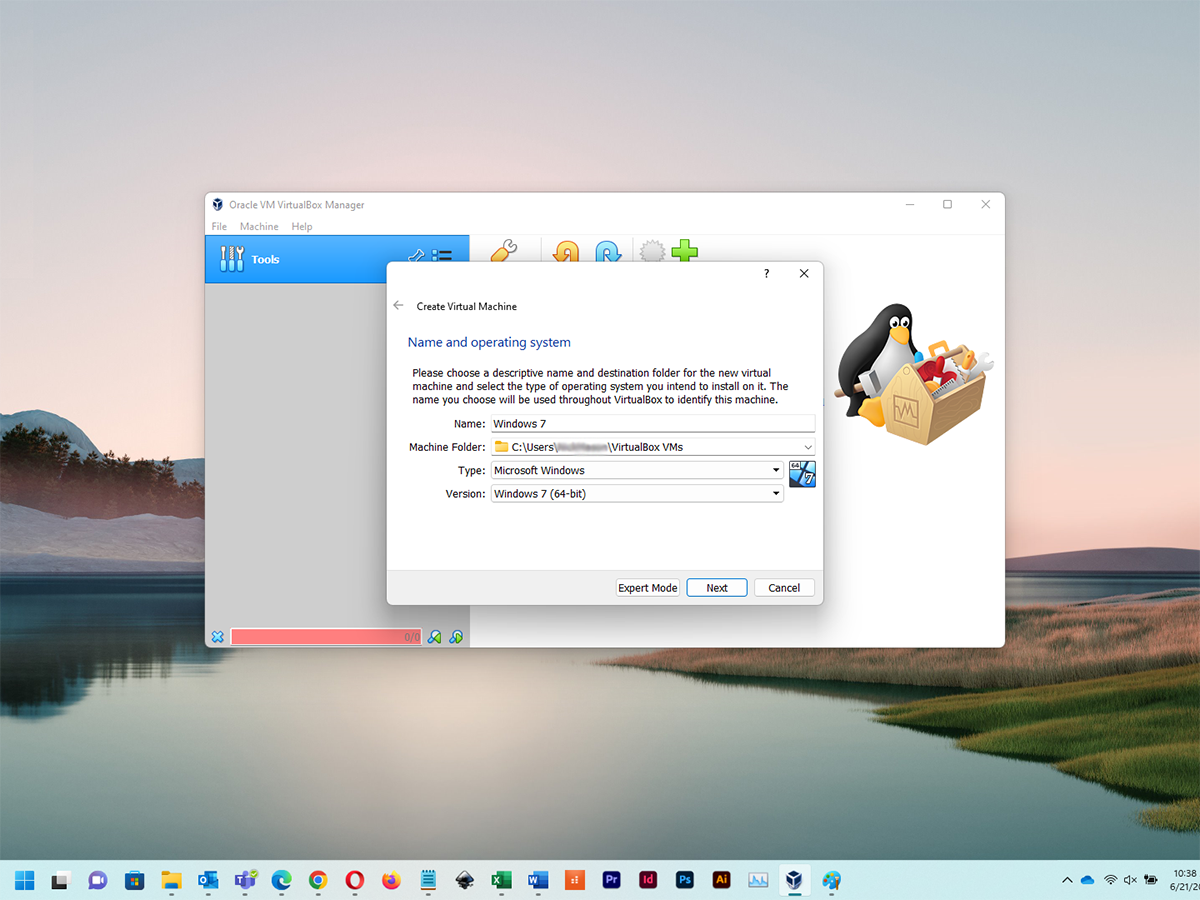
Select “New” from the menu and hit Enter.
- Name: Enter the name for the machine (we suggest using the operating system name/number you will be installing)
- Machine Folder: Location of the VM on your computer
- Type: Microsoft Windows (This is just in our example case. If yours is something else, find the appropriate OS from the list.)
- Version: Select the operating system version (This example is windows 7, 64-bit)
- Click Next.
Step 3
- Memory Size: Leave as default and click Next.
- Hard Disk: Select “Create virtual hard disk now”, then Create.
- Hard Disk File Type: Select “VHD (Virtual hard disk)”, then click Next.
- Storage on Physical Hard Disk: Select “Fixed” size, then click Next.
- File Location and Size: Leave as default and click Create.
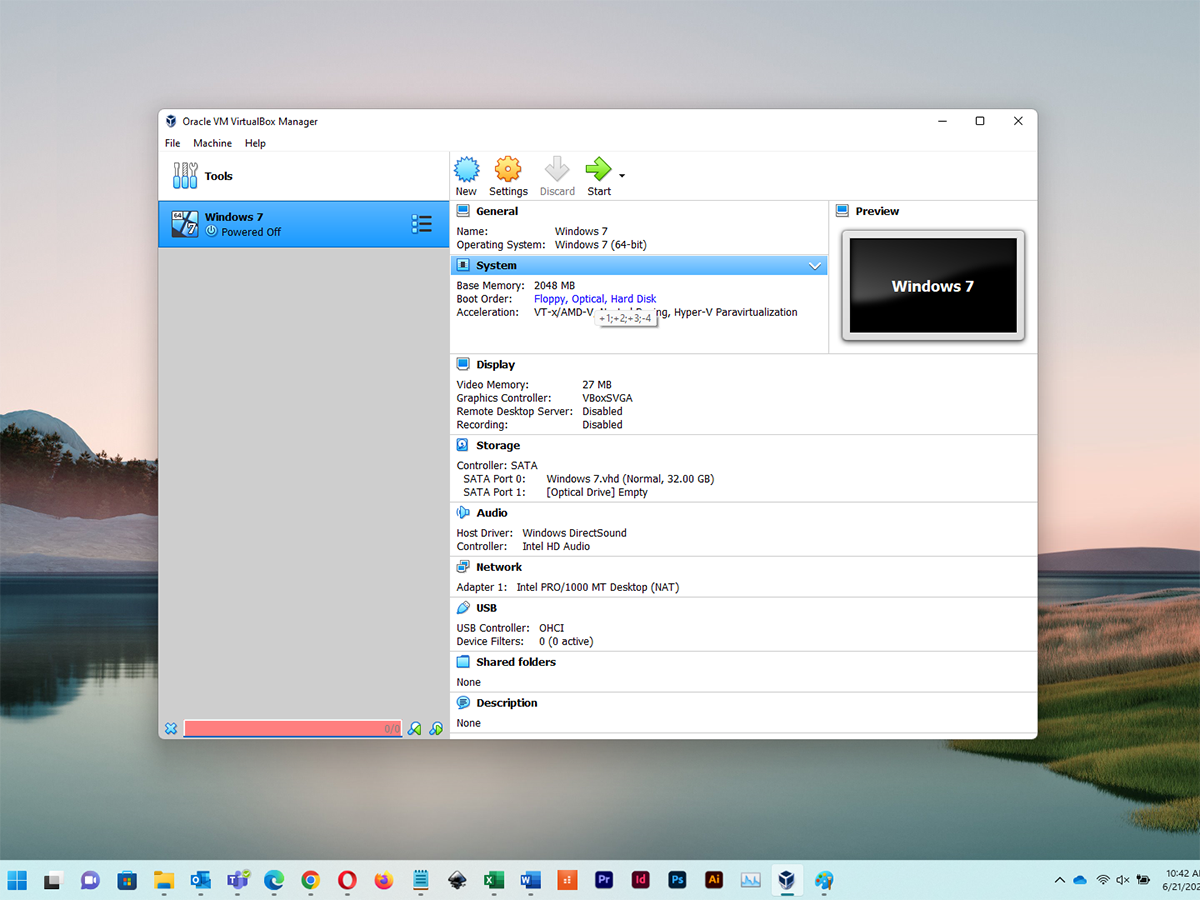
This should take you to the VirtualBox manager screen, where you will see your newly-created VM in the left-hand panel. The right-hand panel will display info concerning this new VM once the VM is clicked on.
Now we move onto the act of actually installing Windows 7 within the virtual machine.
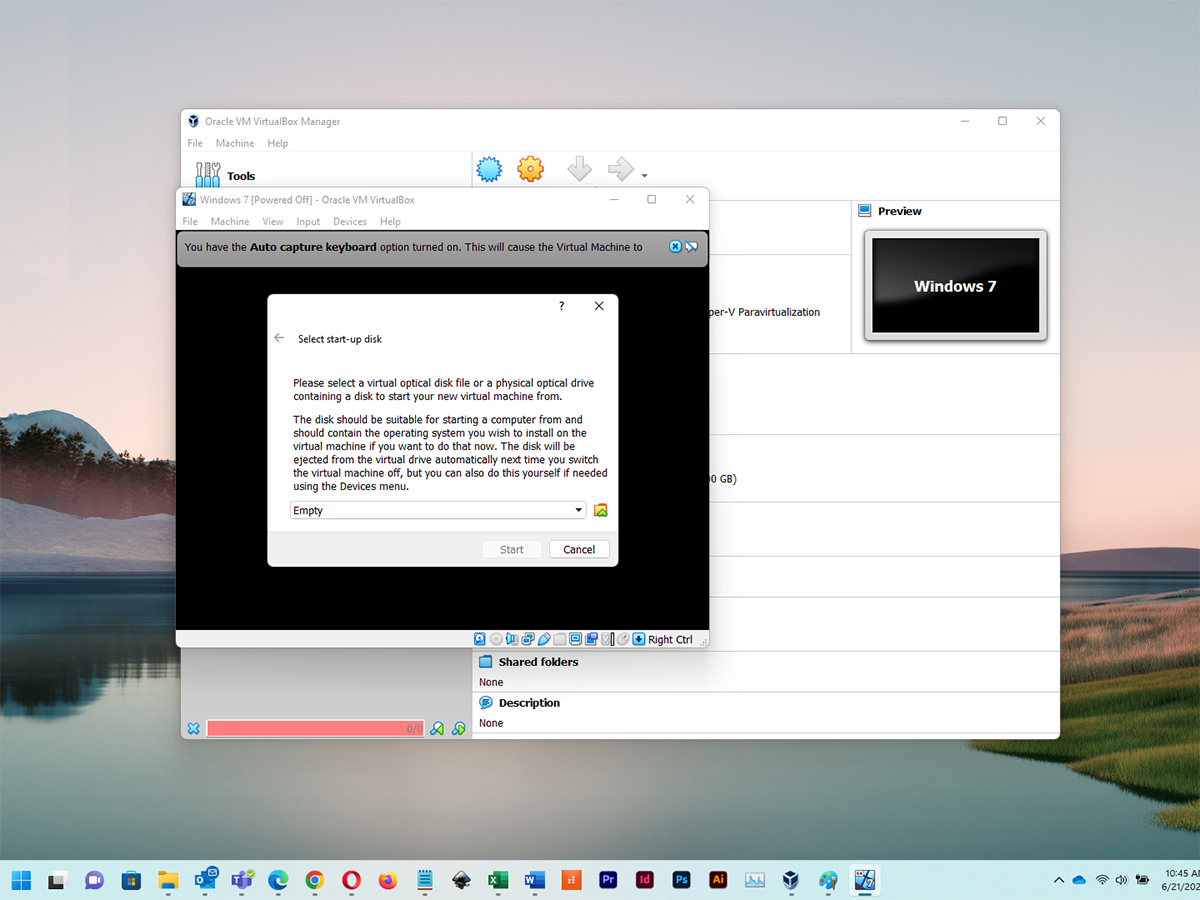
Step 4
Select your VM in the Oracle VM virtual box manager and select start, then select start up disk.
- Choosing a virtual optical disk file: This is where you will need a Windows 7 disk image or ISO in order to proceed. There are several legal ways to obtain this, and we would only recommend doing it that way, of course. Here is a link on how to obtain the ISO files for various Windows versions. Download the Windows version you require and remember the file location.
- In the pop up, select add. (It is the little folder icon with the green arrow.)
- Browse to the location where the VM’s operating system is stored, select open.
- Highlight desired file and select “Choose”, then click Start.
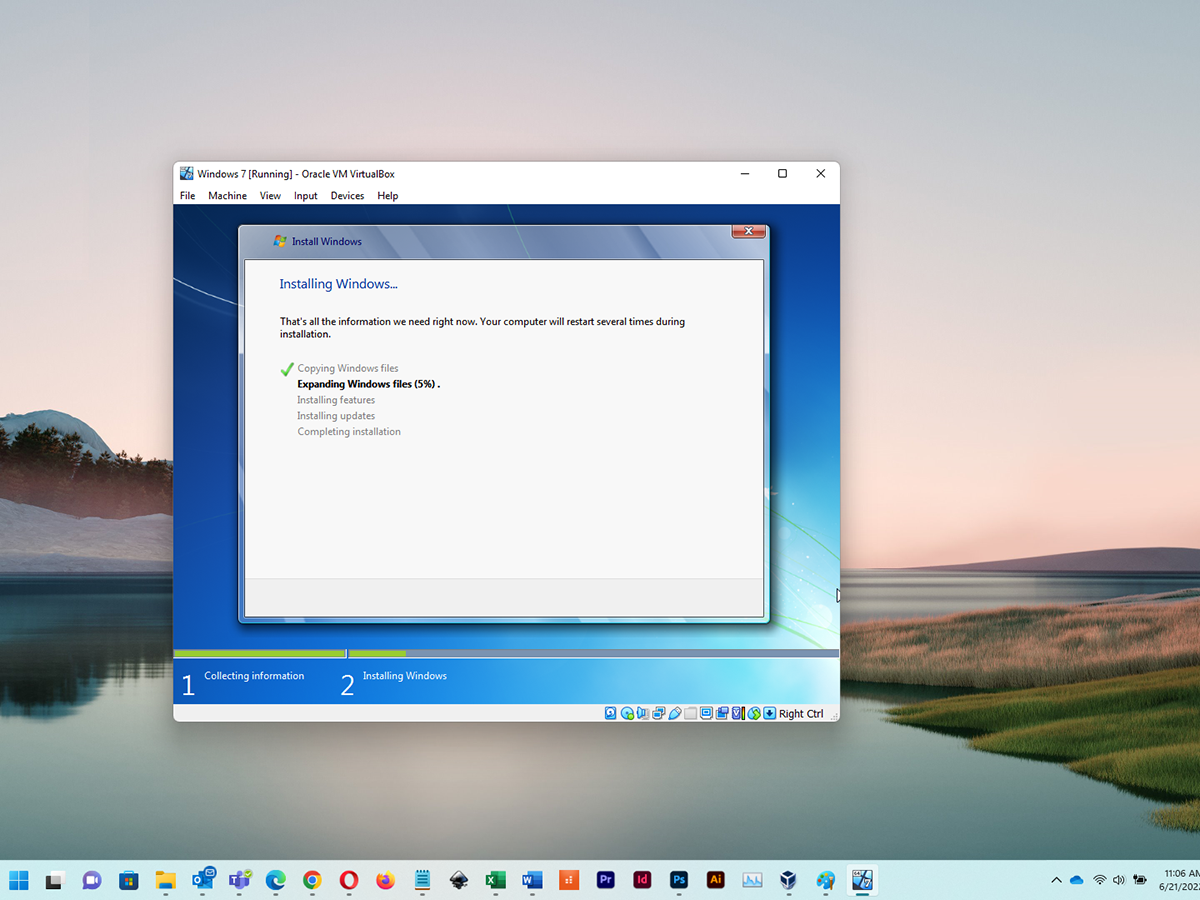
- Select language and location, then click Next, and Install now.
- Click to accept license terms, then click Next.
- Select custom (advanced), then click Next.
- VM will restart after the installation.
Step 5
- After restarting, go ahead and name the VM, then click Next.
- Password: Leave it blank if a password is not desired, then click Next.
- Product key: Skip and use recommended settings.
- Select time zone, then click Next.
- Select desired network type.
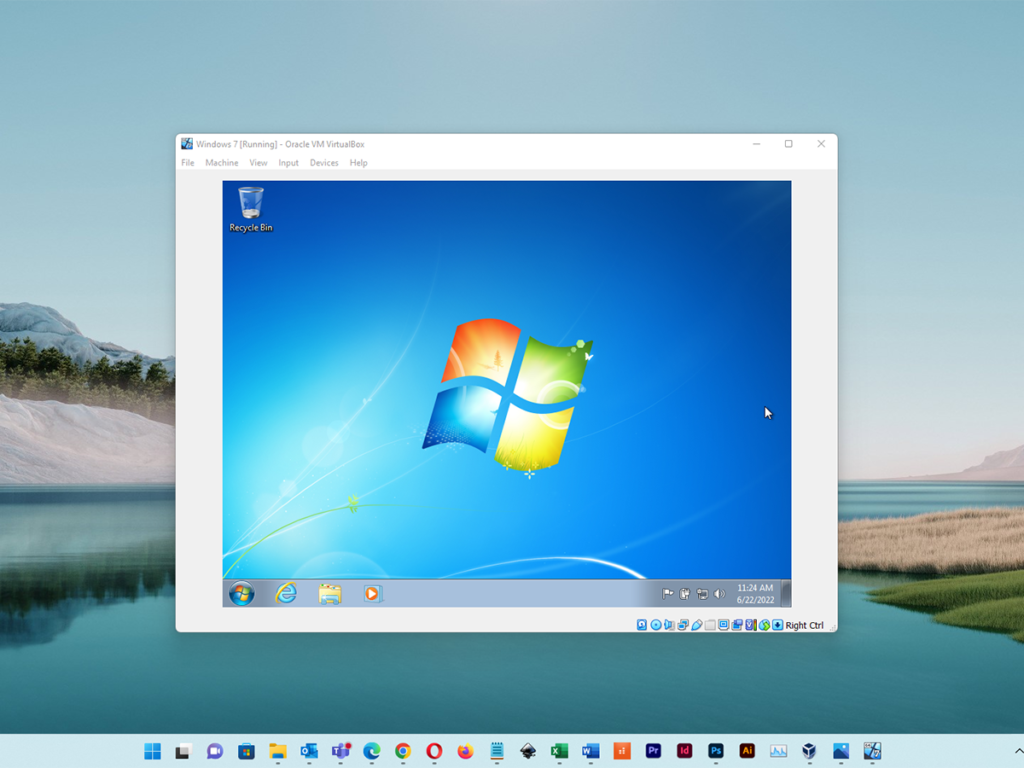
And the VM setup for Windows 7 is complete! Now you can load whatever software you needed to load right into your virtual machine and run it on the OS it was written for.